How to create a gallery wall for your bedroom using prints from Desesnio

how to create a gallery wall in your bedroom using prints from desenio by melissa carne

How to create a gallery wall for your bedroom using prints from Desesnio.

Hello everyone and welcome back to my blog. Todays post is all about how to create a gallery wall in your bedroom using prints from Desesnio. In this interior design blog post I will cover tips on layout, how to pick your prints and how to hang your gallery wall successfully (no crooked pictures here!)

Why I wanted a gallery wall

I think that a gallery wall is an extremely effective, easy and cost efficient way of changing up your bedroom decor. I have been wanting to add something to my room for some time now. You can see how it looked previously in my room makeover post. I was finding that above my bed just felt a bit bear and after looking at bedroom interior pins on pinterest I came to realise that an art gallery wall could be the solution.

Where to get inspiration

Like mentioned above I got my inspiration from Pinterest. I will leave a link to my bedroom pinterest board here. However, everyone’s style is different so it is a matter of hunting down pins you like. Desesnio also have a fantastic feature on their website called gallery walls where they have curated beautiful collections which you can easily shop.

gallery wall in womans bedroom above the bed, bohemien style
using newspaper to plot out the layout of your gallery wall

How to pick your prints for your gallery wall

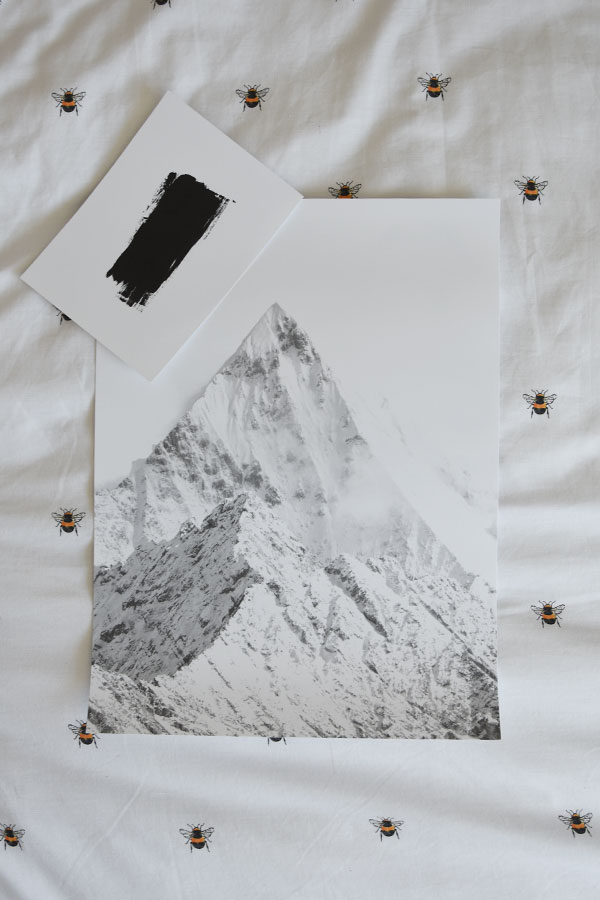
Now admittedly this took me a rather long time. Desenio have so many prints to chose from which is a blessing and a curse! I really wanted to incorporate textures onto my wall, so whether that was with charcoal looking lines on the bigger print. Or the two line drawing prints of hands and a face which have a linen look background. I was going for anything that warmed up my room, making it more homely and inviting.

Once you have found your style and the type of vibe you are going for on your gallery wall I would recommend filtering the searches on Desenio’s site by categories or size. I actually found that not every print came in every size so, this helped tremendously with cutting down the search time. Which leads me onto…

How to figure out the layout for your gallery wall using newspaper

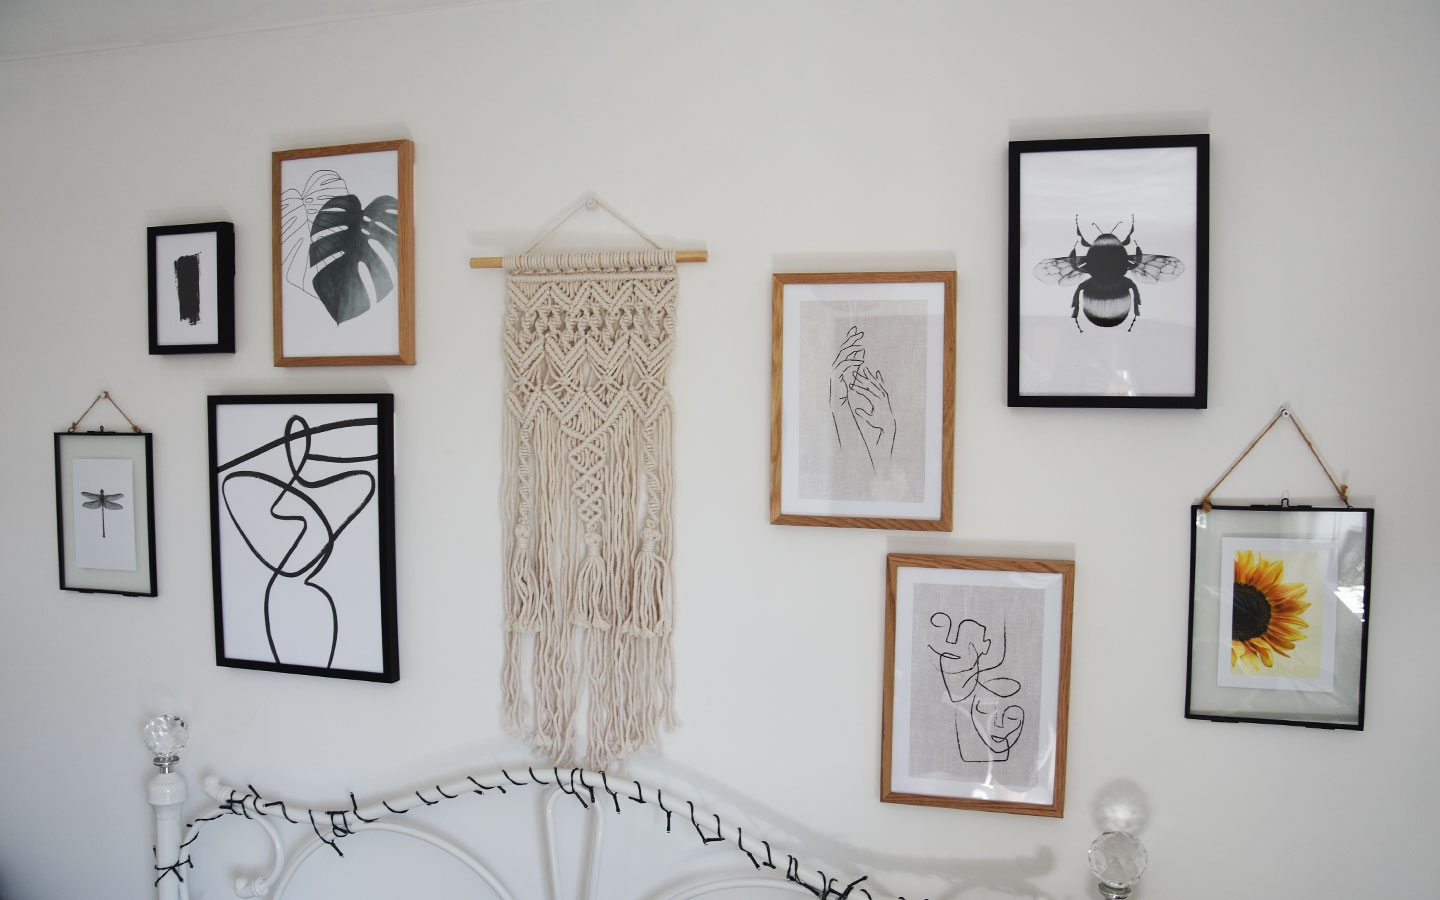
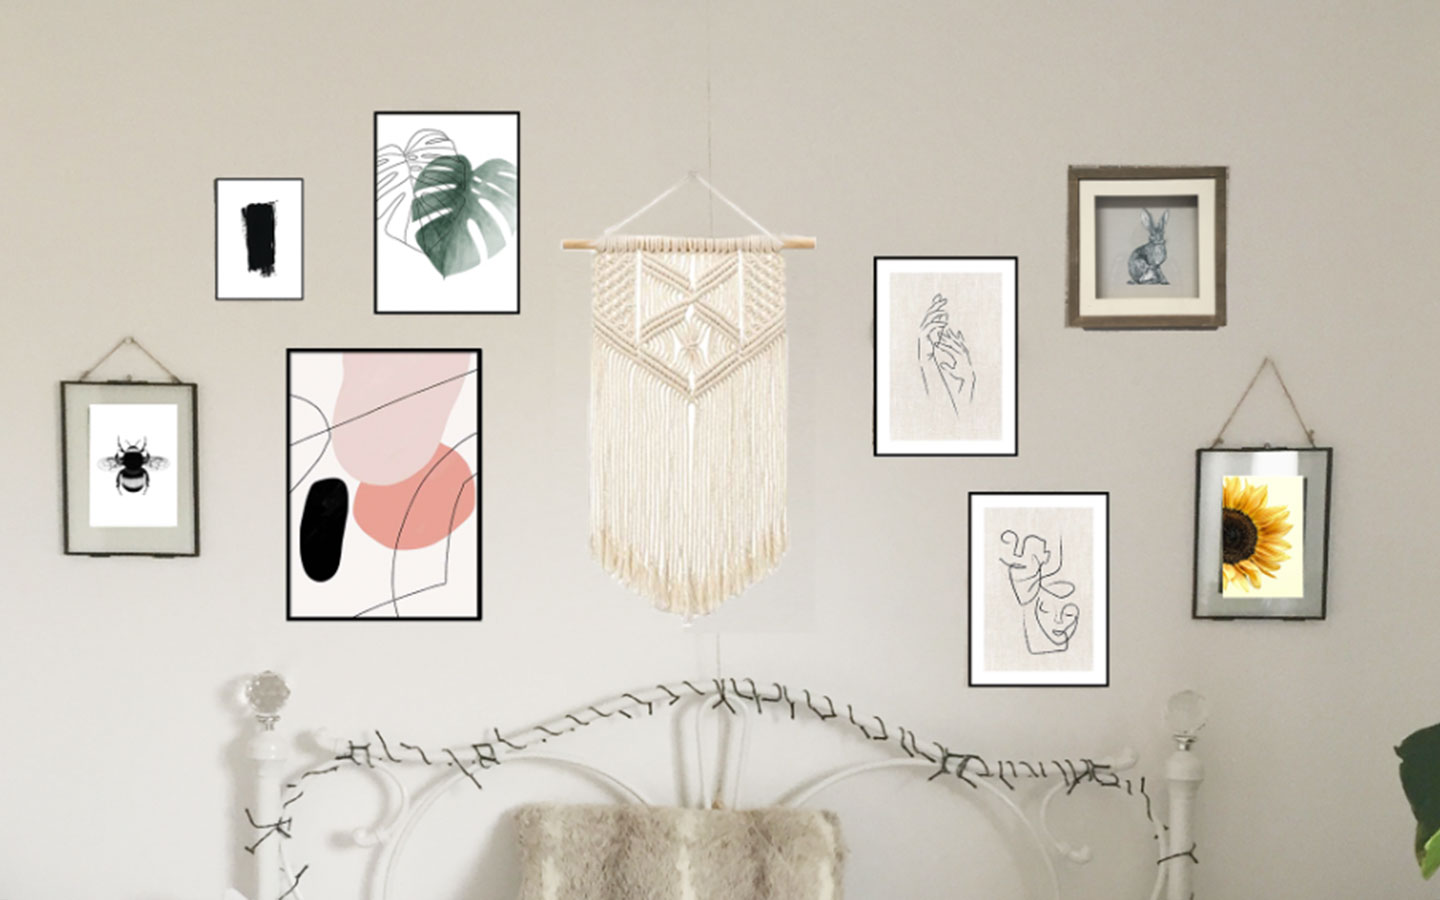
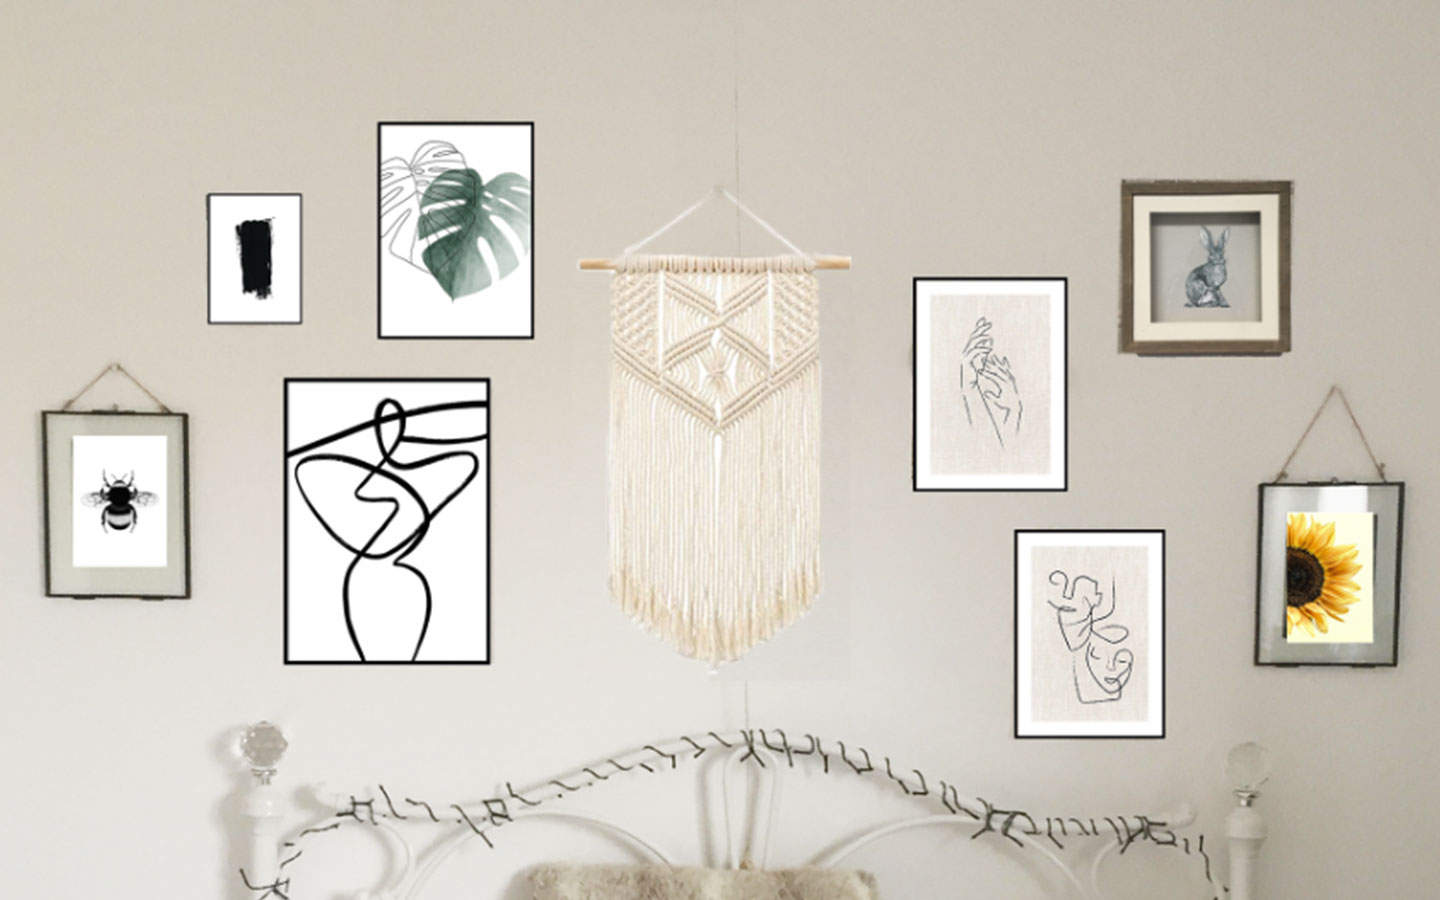
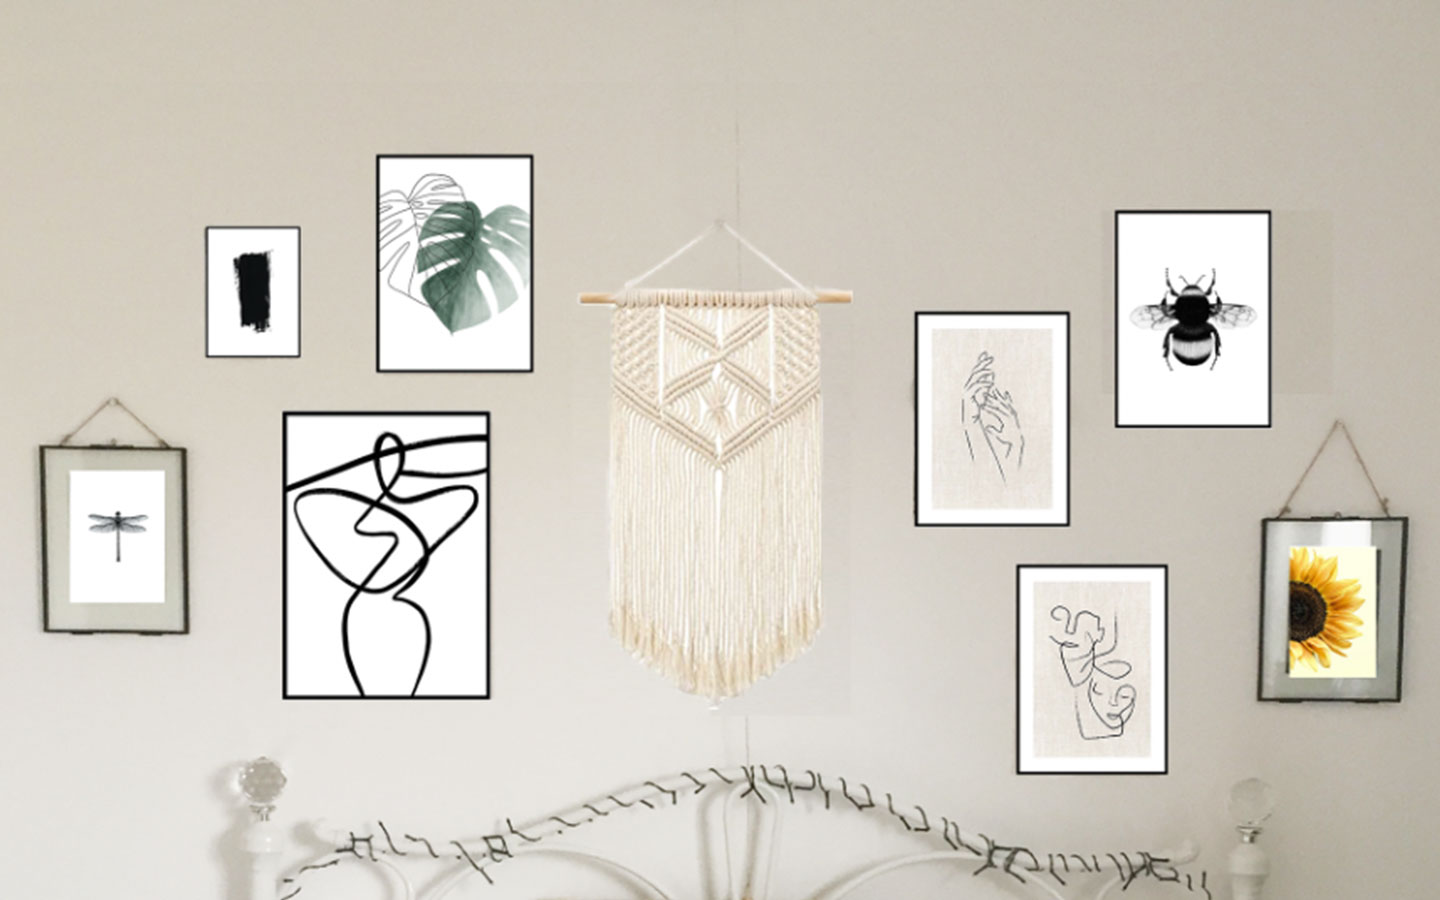
Now from my inspirational Pinterest board I figured out I liked more of a mix matched gallery wall. Whether that was in the various sizes of the prints, the actual layout of the prints on the wall or the frames. In the end I went for 1 large print (30x40cm), 3 medium sized prints (21x30cm) and 3 small prints (13x18cm). This allowed me to achieve the mix match I wanted but also balance. I will also mention that the larger prints and frames also cost more so I did take that into consideration. I also knew I wanted a macrame* to bring in some more of that texture to the wall.

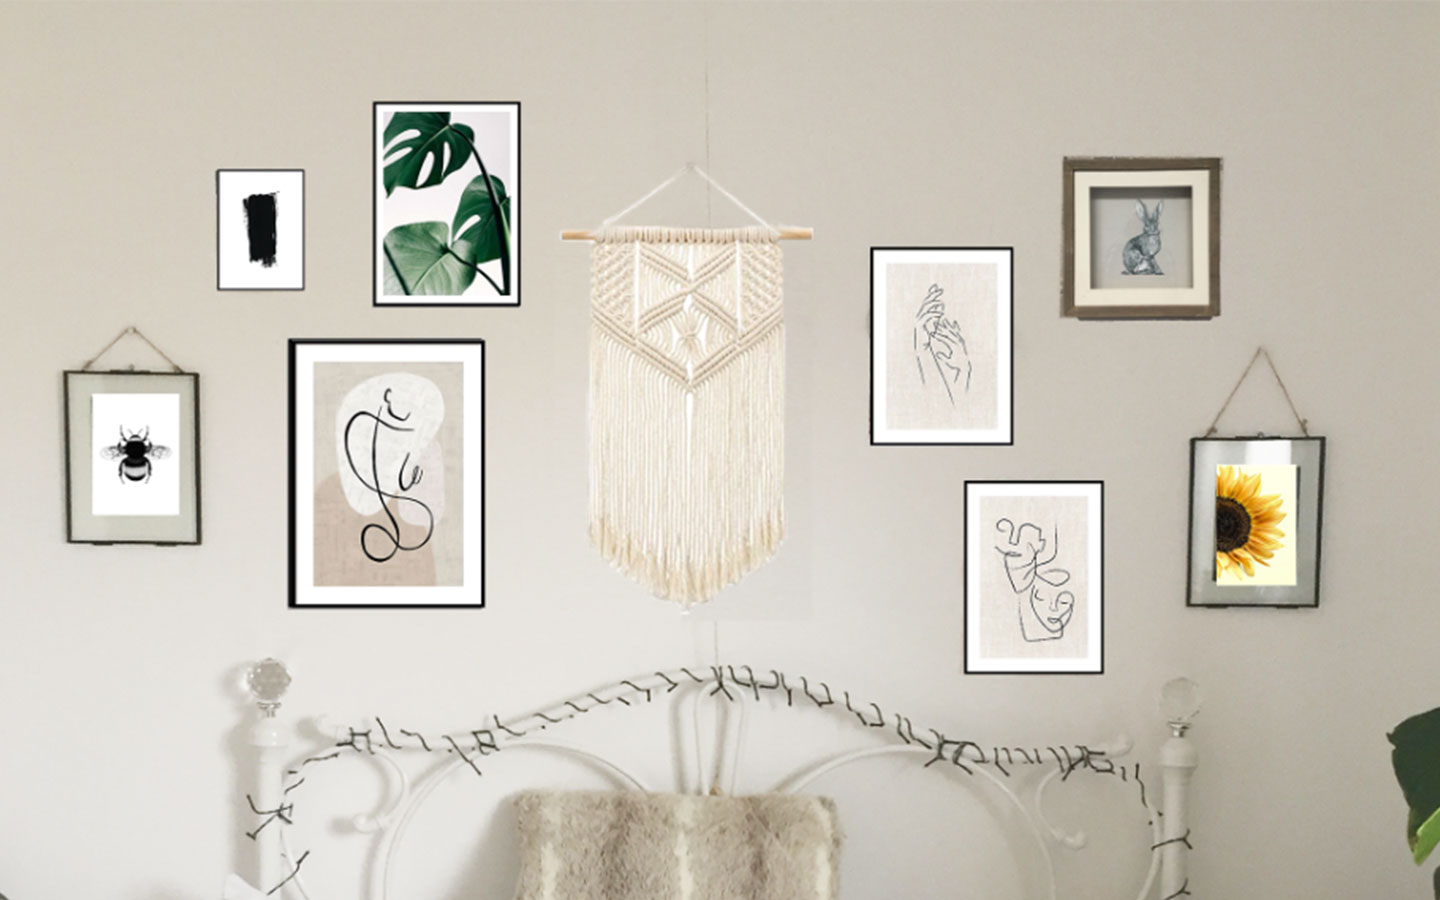
I would recommend once you have a vague idea of what prints you want to get some newspaper and cut out the correct sizes of the prints (which you can see on the website.) Then using a little bit of blu tack* start plotting out the layout of your gallery wall. Be careful as blue tack can mess up white walls so only use a little bit and press lightly.

By using newspaper to plot out your gallery wall you will. A.) Get a much clearer idea of how you gallery wall will look. This means you won’t go over board on buying lots of prints only to return a load. And B.) Save your wall from lots of holes from potential nails.

Mocking up your gallery wall

Now that you are kind of happy with how you’re gallery wall layout is looking, it is time to mock it up! I used Photoshop to do this. I started by taking a photo of my bedroom wall with the newspaper cut outs. I then went onto Desenio and screen shotted all of the prints I was interested in. I pulled these all together in Photoshop and started layering the prints over the newspaper cut outs. This not only allowed me to simulate the size of the prints next to one another but, which prints complimented each other. I also found a macrame* on Amazon and used this to simulate where it would hang.

You may find you really like a print but, cohesively it doesn’t work with the other prints. I would recommend sticking to your theme and colour palette and just mix up the textures of the prints. You can get a flow for the prints by placing ‘busy’ prints next to more calming prints with more negative space. This step might take quite a lot of trail and error. 

You may also find that some prints look better smaller or larger on your gallery wall so play around with size. Just make sure desenio do that print in that size though!

how to mock up a gallery wall of prints for your bedroom
mock up of gallery wall using photoshop
desenio print gallery wall above bed in bedroom
how to chose the layout of your gallery wall
how to hang your gallery wall

buying your frames

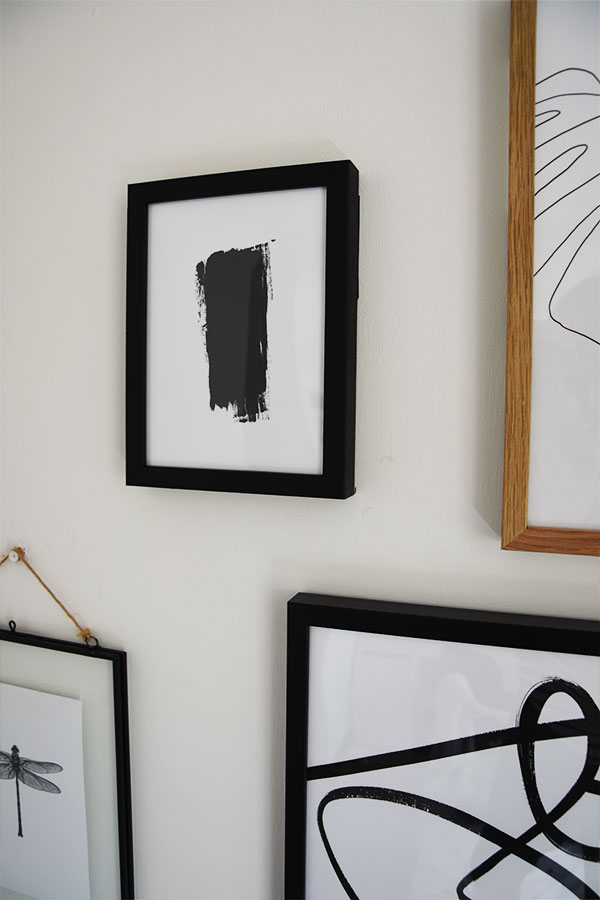
Now you have your gallery wall sorted it is time to buy your prints and their frames. I would recommend buying the frames from Desenio also as it is just super easy and convenient but, that is entirely up to you. I will say that the frames are not the best of quality however, they’re pretty inexpensive so what can you expect. 

There is a lot of choice for what finish you would like on your frames on Desenio. I would recommend picking frames that compliment the artwork inside and the vibe you are going for. As you can see I mix matched my frames. I went for oak and black wood, as again I was trying to add warmth and texture into my room.

HOW TO SAVE MONEY ON YOUR GALLERY WALL

Now you have everything in your checkout keep an eye out for discount codes. You can do this by having a quick google, downloading chrome extensions such as honey. Or simply signing up to their newsletter to receive a discount code or getting a student discount code. I never buy anything online without having a quick look at all of the options above. 9 times out of 10 I save some money on my online purchases. 
 

USE THIS LINK OR THE CODE ‘MELISSA CARNE’ AT CHECKOUT TO RECEIVE £5 OFF YOUR FIRST ORDER FROM DESENIO, WHEN YOU SPEND OVER £30 ON PRINTS!

HANGING YOUR GALLERY WALL

Your print have arrived! Now it’s onto the dreaded part of hanging your gallery wall, this bit always give me anxiety. As you can see in the images, 2 of the frames I have were hanging frames* which I already had nails in the wall for. So these were easy for me to change out.
 
However, instead of using nails I would highly recommend using command strips*. They are so much easier and safer! I ordered mine from Amazon and made sure to get the narrow ones (as Desenio frames are narrow.) Also make sure they are suitable for the weight of your frame, luckily Desenio’s are all pretty light. Even my largest frame is fine with the command strips that says it can take 5.4kg.

How to use command stips
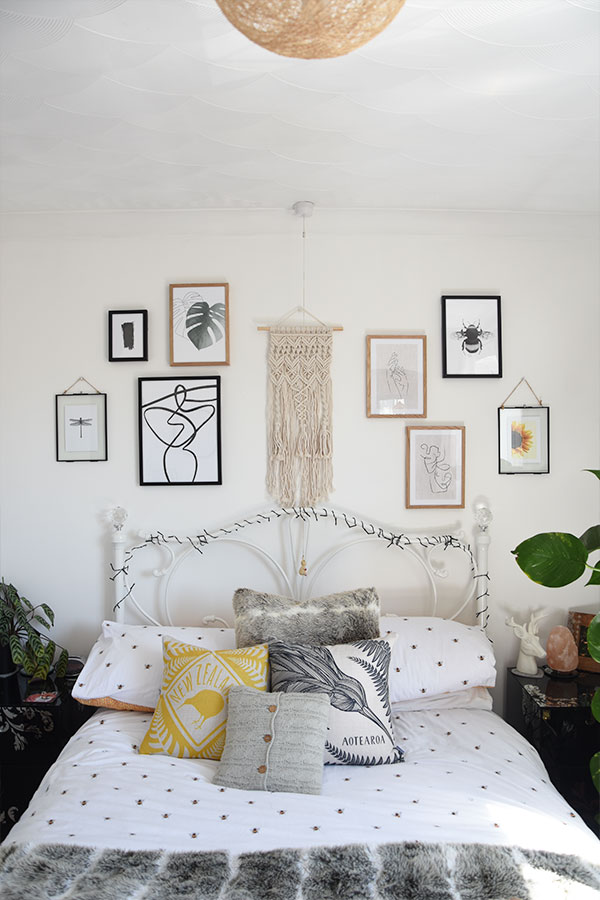
If you never used command strips before they are super easy to use. We actually use a different method from what is says on the packet. I first stick two command strips together making sure it has all cracked together (you will know what I mean when you do it.) I then peel off one side of the command strip and stick to the top half of the frame, as this is where the weight will be the heaviest. Make sure the command strip doesn’t over hang on the outside as you may see this on the wall. I then give it a firm push to make sure it adheres and repeat the same step on the other side.
 
black brish print from desenio on gallery wall
desenio print giveaway for monohromatic gallery wall design
Then I get the wall ready, I grab a pencil and make two little marks on the corner of the newspaper. One going horizontal and one going vertical. I then take the newspaper down and use the pencil marks as a guide. This should stop the picture from going wonky however, I also grab my mum and we do the process together. Having one person stand further away and one person pressing down the frame with the command strips on allows you to see more easily if the frame is straight. Once the frame is in the right position push down firmly on where the command strips are placed for a few minutes. Repeat this process for all of your frames.
 

FINISHED

Voila you now have a perfectly designed and hung gallery wall. The great thing with using command strips as well is that you can change up the prints when you feel like it as they leave no damage. The only thing you will have to do is buy some more as they are only good for on use. I hope that this post was super informative on how to create your own gallery wall at home using Desenio. If you have any questions please don’t hesitate to ask me over on Instagram.
 

Other posts

Another interior post you may enjoy is my room makeover and my two interior YouTube videos: Room makeover before and after and my student room tour. 

SHOP

I am leaving all of the links to all of the products mentioned in this post below to make it super easy for you to shop my gallery wall. Items with a * next to them mean that they are affiliate links. This means that this does not cost you anymore as a consumer to buy the product. But, it gives me a little bit of commission for recommending or inspiring you to purchase it.
 
Dragonfly print from Desenio
Brush print from Desenio
Positano print from Desenio
Bumblebee print from Desenio 
Sunflower print from Desenio
 
Command strips* from Amazon
Macrame* from Amazon (similar)
Make your own macrame kit* from Amazon
Blu Tack* from Amazon
Black metal hanging frame* from Amazon (similar)
Himalayan salt rock lamp* from Amazon (similar)
 
Bee bedding from Asda
Follow:
Share:


Find me on my socials